
Palworld's 1.0 release brought not only new regions and mechanics but also a host of new Pals that force you to rethink team-building from scratch. The old approach of "catch the strongest creature and the rest will follow" is now largely bankrupt, because many partner skills scale based on how many Pals of the same type are in the rest of your team, and the right combination can easily leave squads that look stronger on paper behind. Add the star (★) system to the mix, and the picture becomes this: the same Pal transforms into a completely different creature at 4★. Zenara and Astralym, waiting for you at the top of the World Tree, demand serious preparation in both damage and durability, and on hard mode a backup Pal box enters the equation as well. In this guide, we cover the most efficient setups in 1.0 for combat, player support, resource gathering, exploration, fishing, and breeding, explaining which Pal does which job well and why.
Partner skills and synergy: The invisible math of team-building
In Palworld, when you put a Pal on your team, you aren't just gaining a fighter; a passive effect also comes into play. These effects are called "partner skills" and form the heart of the game's team system. Some partner skills give only a numeric bonus, while others work only when you are riding that Pal. Others affect the whole squad as long as they remain on the team. This is where a critical distinction emerges: knowing which effects can "stack" (accumulate) and which cannot (only one instance applies) determines your squad's true power.
If a partner skill is marked as non-stacking, bringing two of the same Pal gives no extra benefit. That's why, instead of four Gobfins of the same type, it is almost always smarter to line up four different support Pals of different types. By contrast, the skills of Gobfin and Gobfin Ignis do stack; keeping both on the team at once creates a serious pile-up for player attack. Confusing this distinction is the real reason players often ask, "Why isn't my team working?"
The second major variable is star level. Almost all partner skills grow gradually according to how many stars a Pal has. For example, Eikthyrdeer's logging efficiency is around 220 percent at 1★, but can climb to 500 percent at 4★. Similarly, the attack bonus Solenne gives the player opens up from 30 percent to 80 percent depending on stars. So a 0★ Legendary may not replace a 4★ mid-tier Pal. When planning a squad, it is far wiser to ask "which Pals can I make 4★?" before asking "which Pals should I collect?"
The third point is type synergy. Some teams that stand out in 1.0 rely on keeping Pals of the same type together. The Dragon, Ignis, and Dark trio forms the strongest line here. If a Pal's partner skill says "my attack increases for every other Dragon Pal on the team," then the more you stack that type in your squad, the more benefit you gain. This is a system that works against the classic logic of "a mixed squad is always more flexible"; sometimes going all-in on one type produces far more damage than diversity.
Finally, there is the riding dimension. Mounting a flying Pal doesn't just mean fast travel; some partner skills trigger only while you're riding. When you ride Frostallion Noct, your attacks turn into Dark type, and when you ride Solmora Lux, your attacks switch to Electric type. In some cases, the effect of the Pal you're riding also lets you control the effects of items like the Mercy Ring or Pal tamer's glasses; this makes it easier to catch wild Pals without killing them. When building a squad, these three layers — stacking, stars, and type — need to be considered together.

Before building a team: Ways to strengthen your Pals
Let's be clear: because partner skills scale with stars, no team you build without strengthening your Pals will operate at full capacity. In 1.0 there are three main ways to take a Pal to the top, and they are not alternatives to each other but complements. Making a Pal 4★, boosting stats with souls, and awakening are independent systems, so applying all three gives you a truly "finished" creature. Below we explain how these systems work and which one you should prioritize in which situation.
Condensation: Raising stars
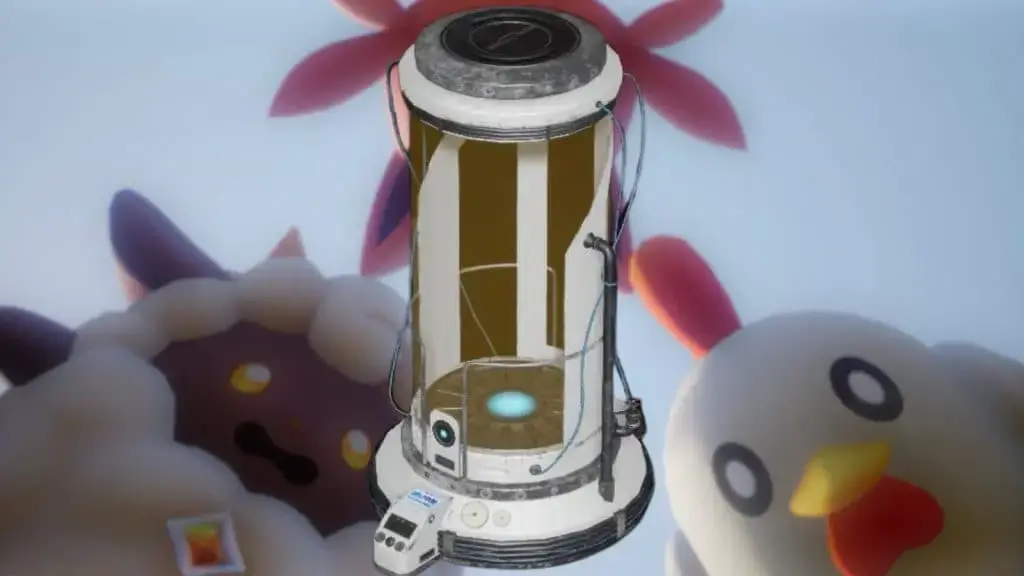
Using a condenser, you can sacrifice Pals of the same type to extract "Pal fluid," and with that fluid you can strengthen a single Pal. The strengthened Pal gains stars, and each new tier directly raises its partner skill. That's why, for players building teams around partner skills, condensation is not an optional decoration but a basic necessity.
The star tiers and required number of Pals work like this:
- 1★: 4 Pals condensed
- 2★: 8 Pals condensed
- 3★: 12 Pals condensed
- 4★: 24 Pals condensed
In total, you need to sacrifice 48 Pals to make a Pal 4★; this shows how serious an investment it is to take a single creature to the top. The good news is that stars are not lost. If you put an already strengthened Pal into the condenser, the stars it has earned transfer instantly to the new Pal. In other words, sacrificing a 2★ Pal gives your target a direct 2★. Also, some Pals are already obtained at 2★; creatures hatching from mutated eggs are the best-known example. So players who work on egg production start their condensation journey several steps ahead.
Statue of Power and Pal souls
Pal souls come from enemies you defeat, expeditions, or resources you find on the ground in the world, and when used at a Statue of Power shaped like an Anubis statue, they permanently raise a Pal's stats. The best part of the system is that you can choose which stat to raise, so you can avoid wasting resources. For a Pal you'll use only in combat, boosting Health, Attack, and Defense is enough, while for a Pal that will work at your base, a Work Speed upgrade alone is sufficient.
Raising a stat from zero to +60 requires exactly these souls:
- 10 small Pal souls
- 6 medium Pal souls
- 6 large Pal souls
- 30 ultimate Pal souls
There are quite a few ways to collect souls. You can find them directly on the ground in the open world; you can get them as loot by catching or killing Pals — the rarer and higher-level the Pal you encounter, the higher the soul quality, and Pals that have become slaves to their rage drop ultimate souls without exception. They can come from chests, dungeons, enemy camps and bases, and the oil rig. They can be obtained through fishing, magnetic gathering, or from the fish pond at your own base. Pals you send on expeditions can occasionally bring back souls. You can collect them from creatures that drop souls by butchering Pals with a Butcher Knife; if you have a Splatterina on your team, your chance of loot from the knife increases significantly. The Pal Disassembly Conveyor works like a Butcher Knife and lets you extract souls from some creatures. Finally, with the Crusher and Ice Grinder, you can convert souls into stronger souls or, conversely, split them to obtain more weak souls.
Awakening: The new peak introduced by 1.0
Awakening is one of the most striking innovations of the 1.0 release. By using Awakening crystals, you grant your favorite Pals a permanent power state, and their stats rise permanently. The critical detail is this: the crystal you need to use must match your Pal's type. In other words, you can't spend any crystal you have on a random creature; you need to save the one of the correct type.
The most valuable aspect of Awakening is that it isn't limited to stats alone. Some Pals' partner skills also grow stronger with Awakening, and even gain an extra effect. For example, Solmora's speed on water additionally begins to increase starting from Awakening level 2. So if you're building a team centered on partner skills, awakening that Pal becomes as important as raising its stars.
Crystals don't drop directly; they are crafted from pieces. By combining 50 Awakening pieces of the same type with 10 holy World Tree waters at the Ancient Workbench, you get a single Awakening crystal. The pieces come from Pal and boss fights in the World Tree region or from loot from World Tree expeditions. Holy water is similarly collected from resources in the World Tree or from Pal and boss battles. Some players report directly getting Awakening crystals from certain bosses; although this is an exceptional case, every hour you spend in the World Tree actually feeds your Awakening journey.
Changing passive skills: The Surgery Table
Passive skills are one of the easiest systems to overlook but one of the most impactful. Using implants at the Surgery Table, you can change a Pal's passive skills and cover its weaknesses. The classic example: base Eidrolon is extremely fast but as fragile as a pug with breathing problems. You can solve this victory-obsessed flying creature's energy problem with implants like Infatigable, Force de la Nature, or Vigueur Éternelle at the Surgery Table, and you end up with a much more balanced fighter.
Implants also come from certain channels:
- Bounty Merchant: Some permanent implants can be bought for 15 Proofs of Victory.
- Arena Merchant: Some legendary implants can be exchanged for Combat Tickets earned from PvE victories in the Arena.
- Ancient Relic Recycler: Unique implants can be obtained by recycling ancient relics collected from the World Tree region. But be careful: once an ancient implant is applied to a Pal, it cannot be used again.
So why are these implants so important? Because while partner skills scale with stars, passive skills act as a multiplier on top of that scaling. When you add the right passives to a 4★ Orserk, you can see your entire squad suddenly jump to a different level.

Combat teams: The payoff of going all-in on one type
Building a combat team looks simple at first glance: line up the strongest Pals and you're done. But in 1.0 things aren't that straightforward. Some Pals, when on the same team, feed each other so well that the resulting squad easily surpasses a random team of legendary Pals. This feeding usually works through type; the Dragon, Ignis, and Dark trio still forms the strongest line here. Alternatively, some players prefer to focus on strengthening their own character rather than their Pals, and those kinds of squads offer a completely different playstyle.
Dragon team: Eidrolon-centered squad
The standout name among non-legendary Pals is unquestionably Eidrolon, both its Dark and Ignis versions. Besides being able to become incredibly strong depending on team composition, it has the advantage of being one of the game's fastest flying mounts. Its durability weakness can be covered with the right passive skills, especially through the Surgery Table. The Dragon team works on the principle that, thanks to certain Pals' partner skills, you gain higher stats depending on how many creatures of the same type are on the team.
- Eidrolon Ignis — Furious Pterodactyl: Essentially an extremely fast flying mount. Its attack and movement speed increase by 2 / 3 / 4 / 5 / 6 percent for every other Dragon or Fire Pal on the team (excluding itself), depending on star count.
- Shaolong — Azure Sovereign: Flying mount. Its attack increases by 4 / 5 / 6 / 7 / 8 percent for every other Dragon Pal on the team (excluding Shaolong), depending on its stars.
- Quivern — Grace of the Celestial Dragon: Flying mount. While on the team, it increases Dragon Pals' attack by 15 to 30 percent depending on its stars (does not stack).
- Orserk — Stormy Dragon: While on the team, each of the player's shots that hits an enemy increases the fighting Pal's attack and defense by 1 / 2 / 3 / 4 / 5 percent for 5 seconds depending on its stars; it can stack up to 30 times (does not stack).
- Blazamut Ryu — King of Dragons: While on the team, it increases the damage dealt when the player or Pals exploit a Dragon-type weakness by 25 / 27 / 30 / 34 / 40 percent depending on its stars (does not stack).
- Eidrolon — Free Pterodactyl: An excellent flying mount. Its attack and movement speed increase by 2 / 3 / 4 / 5 / 6 percent for every other Dragon or Dark Pal on the team (excluding itself).
There's good news for Eidrolon fans: you can also add the Dragon/Dark version to this composition; its partner skill works equivalently to Eidrolon Ignis's. So building the squad to feed both Dragon and Dark can let you collect two different type bonuses at once. The biggest advantage of this tactic is that, because it consists of flying mounts, it can largely avoid ground wave damage.
Fire team: An easier-to-obtain alternative
The Fire team is very similar to the Dragon team in principle, but there is an important practical difference: because Dragon Pals are hard to obtain, the fire line becomes much more attractive for players who want to build similar synergy with more accessible creatures. In other words, we can call it "the same principle, an easier squad."
- Eidrolon Ignis — Furious Pterodactyl: Attack and movement speed increase by 2 / 3 / 4 / 5 / 6 percent for every other Dragon or Fire Pal on the team (excluding itself).
- Dupin — Crusher: When the player's health drops below 50 percent, its attack increases by 30 to 50 percent and a defensive explosion is triggered around it (does not stack).
- Ghangler Ignis — Blue Cord of the Deep: Water mount. Its movement speed increases by 5 / 9 / 13 / 18 / 25 percent for every other Ignis or Water Pal on the team (excluding itself), depending on its stars.
- Moldron — Magma Overflow: Its attack increases by 4 / 5 / 6 / 7 / 8 percent for every other Fire or Ground Pal on the team (excluding itself), depending on its stars.
- Blazehowl Noct — Lion of Black Flames: While on the team, the amount of items obtained by defeating non-elemental Pals increases by 40 / 50 / 60 / 70 / 80 percent depending on its stars (does not stack).
There is one point to note: Blazehowl Noct's skill provides loot efficiency, not combat power. So putting it on the squad means sacrificing a slot where you'd expect direct damage. If you want to both hunt non-elemental Pals and fight at the same time, this trade-off can be quite profitable; but in pure boss fights, it makes more sense to give that slot to a damage Pal.
Dark team: The weight of flying mounts
The Dark team rests on the same principle as the Dragon team; partner skills grant higher stats depending on how many creatures of the same type are on the team. It's a good alternative for players who struggle to collect Dragon Pals, and the weight of flying mounts is felt in this line.
- Frostallion Noct — Black Pegasus: A very good flying mount. When mounted, the player's attacks turn into Dark type, its attack increases by 10 / 14 / 20 / 28 / 40 percent depending on its stars, and its attacks apply 2 / 3 / 4 / 5 / 6 points of Blindness buildup.
- Necromus — Black Knight of the Abyss: If Paladius is on the team, Paladius appears and fights alongside you when using Twin Spear. It is also a very good ground mount; it can double jump and has a high health pool.
- Eidrolon — Free Pterodactyl: An excellent flying mount; attack and speed increase by 2 / 3 / 4 / 5 / 6 percent for every other Dragon or Dark Pal on the team.
- Wistella — Hidden Dark Energy: While on the team, it increases Dark Pals' defense by 15 / 17 / 20 / 24 / 30 percent depending on its stars.
- Selyne — Celestial Darkness: A very good flying mount. When mounted, Selyne's non-elemental and Dark attacks grow stronger by 15 / 17 / 20 / 24 / 30 percent depending on its stars.
The interesting part of this squad is that it can feed both defense and attack at once. When Wistella's defense bonus combines with the high health pool of a standout creature like Necromus, a quite durable line emerges. And because Frostallion Noct completely converts the player's attacks to Dark type when mounted, it also significantly raises your personal damage against enemies with a type weakness.
Team that puts the player forward: Strengthen yourself
If you're a player who likes to join the fight yourself rather than through your Pals, a completely different team logic comes into play. Some Pals stand on the team not to shine as fighters but to raise your attack and defense stats. The best part of this squad is that you produce the damage yourself without depending on your Pals' AI; especially against fast, constantly moving bosses, this approach offers a much more controlled experience.
- Solenne — Indomitable Princess: As long as the 5 Pals on the team are of different types, it gives a 30 / 40 / 50 / 60 / 80 percent bonus to player attack depending on star level.
- Gobfin — Grumbling Shark: Simply by being on the team, it increases player attack by 10 to 20 percent (stacks).
- Gobfin Ignis — Grumbling Shark: Simply by being on the team, it increases player attack by 10 to 20 percent (stacks).
- Dupin — Crusher: When the player's health drops below 50 percent, its attack increases by 30 to 50 percent and a defensive explosion is triggered around it (does not stack).
- Orserk — Stormy Dragon: While on the team, each of your shots that hits an enemy increases the fighting Pal's attack and defense by 1 / 2 / 3 / 4 / 5 percent for 5 seconds depending on its stars; it can stack up to 30 times (does not stack).
Apparently, in this composition Orserk doesn't directly strengthen your stats; but its presence on the team creates a kind of virtuous cycle by making the Pal fighting beside you a little stronger with each of your shots, turning the two of you into a formidable duo. When you put Solenne and Gobfin together in the same squad, player attack multiplies significantly; moreover, since the Gobfins' bonus stacks, using two different versions at once provides a notable gain. Solenne's condition is squad diversity: since all five Pals must be of different types, you need to consciously give up type synergy to get this bonus.
Resource gathering (farm) teams: The carry capacity game
Since it isn't always possible to gather resources only from your base, you need to go on regular "farm" runs in the open world. What determines the efficiency of these runs is often not combat power but carry capacity and material weight. Because every kilogram over your carry limit lowers your movement speed and directly undermines your run efficiency. That's why farm squads are built around partner skills that reduce weight and increase capacity.
Stone and ore gathering squad
For your stone-gathering run, you can highlight these Pals:
- Fuddler: Increases mining efficiency and reduces the weight of stone.
- Lunaris: Increases carry capacity by 300 to 600 percent and makes spheres homing.
- Reptyro: Reduces the weight of all ores.
- Reptyro Cryst: Reduces the weight of all ores.
On a metal ore run, the equation changes a bit; here the Turtacle family comes into play:
- Turtacle: Reduces the weight of metal ore by 80 to 100 percent.
- Turtacle Terra: Reduces the weight of sulfur and coal.
- Lunaris: Increases carry capacity by 300 to 600 percent and makes spheres homing.
- Reptyro and Reptyro Cryst: Reduce the weight of all ores.
The subtle point to note here is this: Lunaris is a common member of almost every farm squad, and that's no coincidence. It both significantly increases carry capacity and makes spheres homing. Homing spheres let you catch Pals you encounter during a gathering run without bothering to aim; in other words, Lunaris actually works as both a "pack animal" and a capture assistant.
Wood and chromite gathering squad
On the wood-gathering side, efficiency depends directly on chopping speed:
- Lunaris: Increases carry capacity by 300 to 600 percent and makes spheres homing.
- Gumoss: Increases chopping damage by 30 to 50 percent, reduces wood weight by 40 to 60 percent.
- Eikthyrdeer: Increases logging efficiency by 220 to 500 percent.
- Any Pal with the Logging Foreman passive skill also contributes to the squad.
Collecting chromite, however, requires a completely different approach because the main issue here is finding veins:
- Lunaris: Increases carry capacity by 300 to 600 percent and makes spheres homing.
- Smokie: Helps find chromite veins and increases chromite obtained while fighting alongside the player by 100 to 200 percent.
In a chromite run, Smokie's value is twofold: it shortens search time and significantly increases the amount collected. So a single Pal you put on the squad saves you both time and number of runs. If you plan to spend a long time in the World Tree region, adding this duo to your standard farm squad makes a big difference in the long run.
Exploration and capture: Secrets of roaming the map freely
If you're a player who loves roaming the map, fighting, and catching Pals, you need to build an exploration-focused squad. This squad's job is not to produce damage but to increase your freedom of movement, protect you from falls, and make open-world interactions easier. In every case, take care to keep at least one mount on your team, and if possible make that mount a flying Pal; because flying Pals can also cross bodies of water without spending energy. This means you can traverse most of the map with a single creature.
There is another critical benefit to mounting a Pal: you can control the effects of items like the Mercy Ring or Pal tamer's glasses. This lets you safely catch wild Pals you encounter during exploration instead of accidentally killing them. Also, to open special chests scattered across the open world, you must have Pals with you that can use Watering, Kindling, and Electrifying abilities; such chests contain contents far more valuable than ordinary loot.
A sample exploration squad optimized for 1.0 looks like this:
- Ophydia — Majestic Mist: Mount. While on the team, player attacks add 2 / 3 / 4 / 5 / 6 points of Wet buildup depending on its stars (does not stack). It also has the Watering ability.
- Orserk — Stormy Dragon: While on the team, each of your shots that hits increases the fighting Pal's attack and defense by 1 / 2 / 3 / 4 / 5 percent for 5 seconds depending on its stars (does not stack). It also has the Electric ability.
- Eidrolon Ignis — Furious Pterodactyl: Essentially an extremely fast flying mount. Attack and speed increase by 2 / 3 / 4 / 5 / 6 percent for every other Dragon or Fire Pal on the team. It also has the Kindling ability.
- Herbil — Plant Push: While on the team, when the player is knocked down, it revives them with 30 / 36 / 42 / 48 / 60 percent of their max health depending on its stars. Awakening also reduces this effect's cooldown.
- Lunaris — Anti-Gravity: While on the team, spheres become homing and automatically track Pals; carry limit increases by 300 / 339 / 399 / 480 / 600 depending on its stars (does not stack).
Aside from these, it's worth noting separately the Pals that will be useful during exploration:
- Lunaris: Increases carry capacity by 300 to 600 and makes spheres homing.
- Cattiva: Increases carry capacity by 100 to 200.
- Galeclaw: Enables fast gliding and shooting while flying.
- Hangyu / Hangyu Cryst: Lets you slowly rise while gliding.
- Celaray / Celaray Lux: Nullifies fall damage and extends fast gliding.
- Killamari / Killamari Primo: Lets you glide in the air for longer.
- Verdash: Grants an extra jump and mid-air dash.
- Gorirat Terra: Increases climbing speed by 50 to 100 percent.
- Valentail: Reduces gravity's effect on jumps and falls.
- Snugloo: Lowers the chance of being noticed by enemies.
- Flopie: Stays by the player and automatically collects items.
- Nox: Shows the location of nearby Pal statues.
- Finsider Ignis: Reduces the weight of weapons by 60 to 100 percent.
- Munchill: Reduces the weight of food and slows its spoilage.
This list is actually designed not for building a single squad but for swapping based on the situation. On very long-distance explorations, Flopie and Lunaris become almost mandatory, while on vertical maps Gorirat Terra and Verdash come into play. Nox is a helper that saves time when you go on collection hunts; knowing statue locations is far more efficient than scanning the map for hours.
Fishing teams: Two completely different goals, two different squads
There are two separate types of fishing in Palworld, and depending on which you choose, you need to build a completely different squad. The first is classic fishing focused on catching powerful Pals; the second is fishing based on using a magnet to gather resources. Trying to combine the two in the same squad is possible but inefficient, because the partner skills required by one don't overlap with the other.
Classic fishing: Hunting high-potential Pals
In this mode, your goal is to pull high-potential Pals out of the water. So the squad is built around skills that raise capture chance and make the minigame easier:
- Solmora — Charismatic Mole: Water mount. While on the team, it increases the chance to catch high-potential Pals by 70 / 72 / 74 / 76 / 80 percent depending on its stars. Starting from Awakening level 2, its speed on water also increases by 10 / 14 / 18 / 25 percent.
- Solmora Lux — Plasmic Mole: Water mount. When mounted, the player's attacks turn into Electric type and its attack increases by 5 / 7 / 10 / 14 / 20 percent. While on the team, it raises the chance to catch high-potential Pals by 74 / 76 / 78 / 80 / 82 percent depending on its stars (does not stack).
- Whalaska Ignis — Warm-Blooded Whale: Water mount. While on the team, the fishing minigame starts with an additional catch gauge of 7 / 9 / 11 / 13 / 17 percent depending on its stars, and when the bars overlap, the gauge's progress increases by the same amount (does not stack).
- Jelliette: While on the team, it increases the amount of items obtained from fish by 55 / 65 / 75 / 85 / 95 percent depending on its stars (does not stack).
- Gloopie: While on the team, it reduces the decrease of the catch gauge when the bars don't overlap in the fishing minigame by 12 / 17 / 22 / 28 / 35 percent depending on its stars (does not stack).
The logic of this squad actually splits in two: Pals that raise capture chance (Solmora and Solmora Lux) and Pals that make the minigame more forgiving (Whalaska Ignis and Gloopie). You need to be careful when putting Solmora and Solmora Lux on the same squad because their capture chance bonuses do not stack; that is, the second copy doesn't give you an extra percent. However, since the Electric-type conversion Solmora Lux offers as a mount is a completely different advantage, it can still be kept on the squad.
Magnetic fishing: Resource-gathering-focused squad
In the second fishing type, the goal is not to catch Pals but to gather resources with the help of a magnet. So the squad is built around skills that make the minigame easier and increase the amount of items gathered:
- Whalaska Ignis — Warm-Blooded Whale: Water mount. The fishing minigame starts with an additional catch gauge of 7 / 9 / 11 / 13 / 17 percent depending on its stars, and when the bars overlap, progress increases by the same amount (does not stack).
- Whalaska — Cool Whale: Water mount. It starts the minigame with an additional catch gauge of 5 / 7 / 9 / 11 / 14 percent depending on its stars and speeds up progress by the same amount. It also makes high-potential Pals easier to hold (does not stack).
- Gloopie: Reduces the decrease of the catch gauge when the bars don't overlap by 12 / 17 / 22 / 28 / 35 percent depending on its stars (does not stack).
- Jellroy: While on the team, it increases the amount of items gathered with the magnet by 55 / 65 / 75 / 85 / 95 percent depending on its stars (does not stack).
- Lunaris — Anti-Gravity: Makes spheres homing and increases carry limit by 300 / 339 / 399 / 480 / 600 (does not stack).
Here, Lunaris's presence is again key. In magnetic fishing, as the amount of resources gathered increases, the weight problem also grows; therefore, without a Pal that raises carry capacity, these runs can quickly turn into torture. Don't forget the Jelliette and Jellroy siblings either: one increases item amount in classic fishing, the other in magnetic gathering, so the two are not interchangeable.
Breeding team: More and better-quality eggs
In 1.0, for players who take the breeding system seriously, carrying certain Pals with saddles on the team becomes the most practical way to obtain more and higher-quality eggs. So the breeding squad should be thought of as a "gathering" squad completely independent from your combat squad.
- Broncherry — Blossom of First Love: While on the team, it gives each collected egg a 35 / 37 / 39 / 41 / 45 percent chance depending on its stars to be replaced with an Alpha Pal egg (does not stack).
- Broncherry Aqua — Blossom of Purity: While on the team, it gives each collected egg a 45 / 47 / 49 / 51 / 55 percent chance depending on its stars to turn into an Alpha Pal egg (does not stack).
- Grintale — Lynx Eye: While on the team, when a Pal egg is obtained, it increases the chance to collect an extra egg by 50 / 55 / 60 / 65 / 75 percent depending on its stars (does not stack).
- Lunaris — Anti-Gravity: Makes spheres homing and increases carry limit by 300 / 339 / 399 / 480 / 600 (does not stack).
The most striking detail here is this: if you have both Broncherry and Broncherry Aqua on your team, and both are 4★ with saddles equipped, the transformation of the eggs you collect into Alpha eggs is guaranteed at 100 percent. This is a concrete target that takes breeding efficiency to the top; it also nicely shows why raising stars isn't necessary only for combat. For more detailed information about the breeding system, it's worth checking the game's breeding guides; however, on the squad side, making these four standard significantly speeds up egg hunting in the long run.
World Tree finale: Squad against Zenara and Astralym
Zenara and Astralym are one of the game's toughest encounters and demand a strong, optimized squad. But the good part is this: by taking certain points into account, it is possible to beat these bosses. One of the most critical details is that flying Pals have a slight advantage in this fight. Because one of Astralym's attacks is a meteor shower, and this attack causes Pals that stay on the ground and engage in melee to take serious damage from every shockwave. Creatures that hover in the air largely overcome this problem.
Normal mode: Boss hunting with Dragon synergy
An optimized squad that works in normal mode is as follows:
- Eidrolon Ignis: Attack and speed increase by 2 / 3 / 4 / 5 / 6 percent for every other Dragon or Fire Pal on the team (excluding itself).
- Eidrolon: Attack and speed increase by 2 / 3 / 4 / 5 / 6 percent for every other Dragon or Dark Pal on the team (excluding itself).
- Solenne: As long as the 5 Pals on the team are of different types, it gives a 30 / 40 / 50 / 60 / 80 percent bonus to player attack depending on star level.
- Shaolong: Its attack increases by 4 / 5 / 6 / 7 / 8 percent for every other Dragon Pal on the team (excluding itself), depending on its stars.
- Quivern: While on the team, it increases Dragon Pals' attack by 15 to 30 percent (does not stack).
The working principle of this squad is quite clear: Eidrolon Ignis is fed by the presence of other Dragon or Ignis Pals on the team, and when it is 4★, it gains a 6 percent attack and speed bonus for each additional Pal on the team. This means you need to make all your Pals 4★ before the fight; that is already the recommended standard for this fight. Making a separate place for Solenne, meanwhile, significantly raises player attack. In fact, the player joining the fight personally is more than a recommendation here; because the most effective way to interrupt some of the boss's charged attacks is the damage you deal.
Hard mode: The Pal box and the change in squad logic
Hard mode is not simply a strengthened version of normal mode. The fight takes on a raid boss format and a Pal box appears. So a well-optimized squad alone is no longer enough; you need a large number of Pals to drop into the box in the fight arena.
Since this fight is one of the game's toughest encounters, winning without level 80 and already strengthened, solid Pals is nearly impossible. In short: you need to grind to get enough good Pals to level 80, 4★, and Awakened. However, the encouraging part is that at this stage any good Pal can work, because Astralym doesn't have a specific type, and therefore no real weakness.
There are two major factors that reverse squad logic in hard mode. First, you can't benefit from partner skills that work while on the team, because the Pals are waiting in the box. This pulls many creatures back onto equal footing. Second, because Astralym teleports frequently, Pals that focus on melee lose time. That's why you should primarily choose fast, hard-hitting Pals, especially ranged ones. If you're undecided between multiple Pals, prefer those that can fly; the boss's attacks don't change in hard mode, so hovering creatures can dodge at least some of the abilities that affect ground-bound Pals. In other words, here it's not building the right squad but preparing the right Pal pool that becomes decisive.
Conclusion: Building a squad is putting the right Pal in the right place
Palworld 1.0's squad system may look complex at first glance, but it can actually be reduced to a single question: what does this Pal do when it's on the team? Some produce damage, some feed the team, some only increase carry capacity, and some work only when you mount them. The right team is born from a conscious mix of these roles, not from randomly lining up the five creatures with the highest attack stats.
When putting this into practice, we recommend following this order: first, determine which Pals you can make 4★, because the power of partner skills depends on it; then, according to your intended playstyle (combat, resource gathering, exploration, fishing, breeding), choose a core squad from the relevant Pal list; finally, arrange passive skills at the Surgery Table and start saving Awakening crystals for Pals of the correct type. Once you complete these three steps, you'll see for yourself in-game why type synergy is more valuable than a single legendary Pal.
One final reminder: the setups in this guide are starting points, not strict rules. The Pal pool you have, the mode you play, and even your playstyle will shape the squad. But if you know which Pal contributes to your team with which skill, you can build your own ideal squad much faster and more accurately; and Palworld's 1.0 release rewards exactly that.